2026 Author: Erin Ralphs | ralphs@carsalmanac.com. Last modified: 2025-01-22 21:14:12
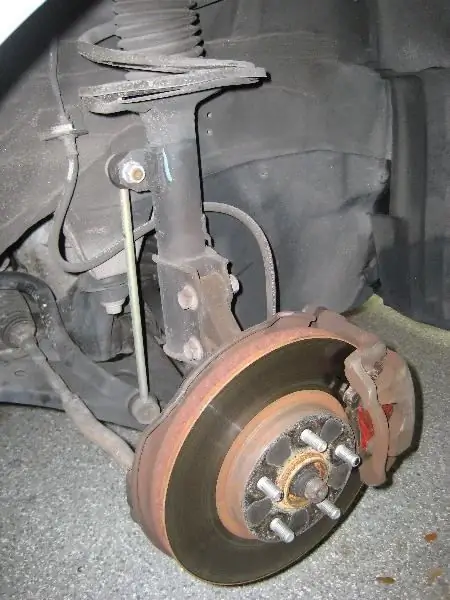
The suspension arm is connected to the center of the wheel (hub) with a ball joint. Symptoms of the failure of this unit are: knocking while driving over bumps, "wagging" the car on a flat road, uneven tire wear and a creak when the steering wheel is turned all the way. What causes a ball joint to fail?
Causes of ball joint wear
The main enemies of the ball have always been water and dirt. They can get on the joints only if the anther is worn - a rubber boot that protects the hinge from external influences. It either wears out during operation (dries out, cracks), or can be damaged mechanically (for example, during suspension repairs).

The service life of the ball joint varies from 15 thousand km to 120. The indicator depends on the operating conditions of the car and the condition of the protective boot.
Self Diagnosis
The best option to find a malfunction is always a diagnostic stand at the service station. Butit is also possible to find a breakdown on your own. To determine the malfunction of the ball joint by ear, you will need an assistant who will rock the car from side to side, while the owner himself carefully listens to all the squeaks and knocks that the suspension makes.

Checking the condition of the ball joints visually is much more effective, but you will need a viewing hole or a lift. The assistant holds the brake pedal while the owner rocks the wheel. If there is play, then the ball joint must be changed or, in order to save money, try to restore it.
Repair and restoration of the ball joint
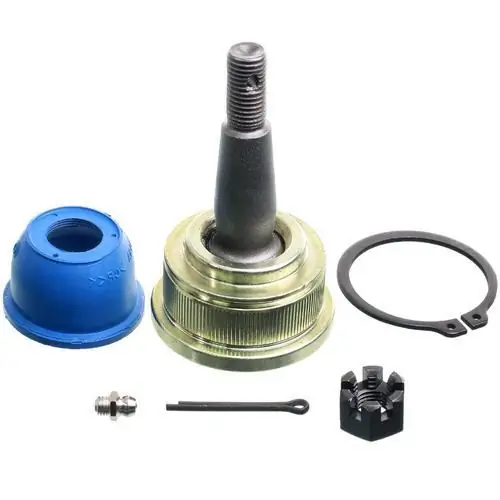
The ball joint can be either collapsible (for example, in domestic cars) or non-collapsible. Of course, repairing a unit that can be disassembled for parts is much easier. The ball joint is dismantled, disassembled and worn parts are changed. As a rule, these are polymer inserts and anther. Then install the node in place. Repair of ball bearings (collapsible) is over.
If the ball is not disassembled, then either the grinder makes the support collapsible, but after repair the structure is restored by welding, or they use a more humane method and pour liquid polymer into the ball under pressure.

Many people recommend disassembling the support anyway to grind the axle ball or replace it.
How to disassemble non-separable
Before disassembling the ball joint, it must be removed. To do this:
- Jacking up the car and dismantling the wheel.
- Turn the steering wheel all the way out.
- Remove the cotter pin from the nut with pliers.
- Unscrew the nut and use a puller to squeeze out the axle.
- Turn off the ball mount.
- With the help of a pry bar we press the lower arm, and you can remove the ball joint.
Now you need to dismantle the support. If it consists of two welded cups, then on one of them it is necessary to drill several welding points, and then separate these cups with a chisel. Then a finger with an insert is inserted into the body, and the halves of the cups are welded together. Be careful not to overheat this earbud.

If the case has an inserted bottom, then the flared edges are cleaned off with a grinder or emery. Then they hit the end of the axle with a hammer to knock out the bottom. The outer and inner diameters of the body are measured and a 10 mm high steel ring with a thread and a plug is made. It is welded to the support body. Insert a finger with an insert and screw in the cork so that it presses this insert. A hole of 2 mm is drilled in the ring as close as possible to the cork and it is cottered.
To install the ball joint in place, you must:
- Attach the ball to the lower arm and secure it.
- Install the pin (axle) in the seat, while depressing the lower lever.
- Tighten the nut on the finger.
- If the finger rotates at the landing site, use the pry bar to pull the lever up.
A puller is not required when installing the support in place. Re-install and removethe ball joint will be easier if you replace the cotter pin with self-locking nuts.
Liquid polymer application method
Ready-made rods filled with liquid polymer are available for sale to restore ball joints with your own hands. The polymer composition is specially designed for nodes with increased load. It withstands pressures over 1000 kg/cm2and dampens friction. Unaffected by lubricants. Ensures the restoration of the ball joint and its operation for about 100,000 km of run. You can use this repair method several times.
The technology of this method is quite simple. Using an extruder with pneumatic force, the polymer is injected through a special hole into the body of the unit. It fills the voids inside, completely repeats the contour of the support pin and takes on all the loads.
Ball joint repair machine
To properly perform work on the restoration of the ball joint, you must use the machine. It is designed to measure the temperature of the polymer and correctly feed it into the ball body.

Standard ball joint remanufacturing machine consists of:
- from the control unit;
- extruder;
- compressor;
- air cylinder;
- thermal pencil;
- several nozzle adapters;
- polymer.
The extruder with the polymer inside is screwed to the pneumatic cylinder. A threaded hole is made in the worn support and an adapter nozzle of the required size is inserted into it,which is connected to the extruder nozzle.
After the polymer material becomes soft, the pneumatic cylinder is started, which squeezes it through the plunger and nozzle into the support. In the case when the material is filled incorrectly, the ball joint will last about 30,000 more km.
It is worth considering that overheating of the polymer material deprives it of all the necessary properties. Therefore, you should carefully read the instructions attached to it and monitor the temperature regime according to the readings of the machine.
Equipment for restoring ball joints can be designed by yourself: make an extruder on a lathe, and buy other parts in a hardware store.
The only reason why this technology cannot be used is corrosion and mechanical damage to the metal structure itself. In this case, the ball joint is not subject to any restoration and, accordingly, further operation too.
Recommended:
Do-it-yourself ball joint replacement

Imagine the situation. You are driving into nature, along a country road. Here the car runs into a bump, after which further movement is not possible, since the ball joint has torn out. But luckily, there is a car shop nearby. So now it just needs to be changed
Which ball joint lasts longer?

Every car needs timely care. It can be a simple replacement of consumables, or it can be an expensive overhaul. The pendant is no exception. But how do you know what parts to buy and what to look for when choosing?
Repair and restoration of the car body: step by step instructions and device

Even if you get into a small accident, the price of restoration work can be quite high. It seems that the complexity of the work is small and there is nothing complicated in their implementation. If there is a great desire, a little time, the necessary resources and tools, then restoring the body on your own is a completely feasible process. Let's look at the recovery technologies in stages
Ball joint anther: overview, device, diagram

The ball joint in modern cars is one of the elements of the steering wheel suspension system. Thanks to this support, the suspension arms are rigidly, but with some mobility, fixed to the wheel hub. This very support is located on the bottom of the car and is under severe stress. To protect the mechanism from the harmful effects of dust and dirt from the road, a ball joint boot is used
Do-it-yourself replacement of thrust bearings

Currently the most popular type of chassis is the MacPherson suspension. It is present on all modern cars, including domestic ones. A vivid example of this is the VAZ of the "ninth" family. However, no matter what car this suspension is on, its most vulnerable link will remain the thrust bearing. A symptom that indicates the need to replace it is a characteristic knock near the wheel arches of the car

