2026 Author: Erin Ralphs | ralphs@carsalmanac.com. Last modified: 2025-01-22 21:14:11
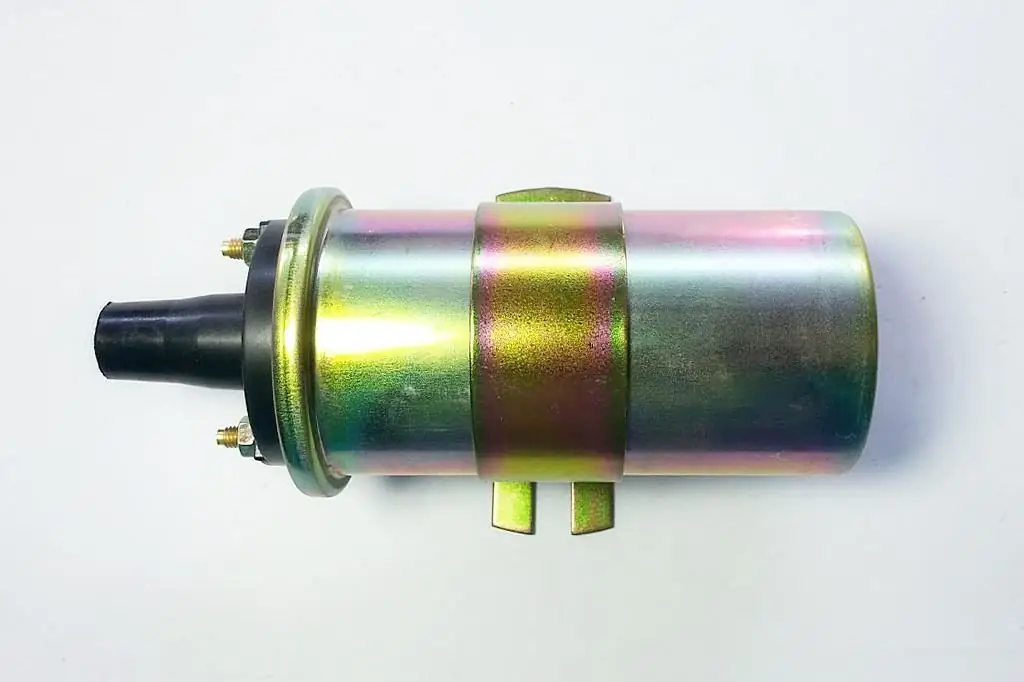
The operation of a gasoline internal combustion engine is impossible without an ignition coil (SC). It is she who generates high voltage for the formation of a full-fledged igniter spark. This has remained unchanged since the advent of the automobile, despite the fact that the coil itself has undergone a significant transformation during this time. But as before, when a spark disappears, it first of all falls under suspicion. Therefore, even the owner of a modern car needs to know how to check the ignition coil and what symptoms will be if it is damaged.
Short circuit design
Any ignition coil is primarily a high-voltage transformer consisting of two windings. One of them, the primary one, receives low voltage pulses. It is wound with a large-section wire and contains a minimum number of turns (about 150). Therefore, its resistance is small.
The other winding is called the secondary, high voltage is induced on it, causing sparking in the cylinders. The cross section of the wires of this winding is tenths of a millimeter, and the number of turns is several thousand. Accordingly, andits resistance is quite large - several kilo-ohms. The exact numbers don't matter yet. The main thing to remember is that the primary winding is a few ohms, and the secondary is a few kilohms. This will come in handy in the future, since you can check the he alth of the ignition coil only by measuring its resistance.

Varieties of short circuit
The ignition system of the car was improved simultaneously with the modernization of the engine. At the moment, there are three main types of short circuits:
- Classic, also called "reel". It was installed on carbureted cars until their production was discontinued.
- Ignition module. It is still installed on some models of modern cars, most often domestic ones.
- Individual coil. Most often responsible for sparking in 16 valve engines.
All short circuits have one thing in common - purpose. Even in the most modern engine, designers could not do without high voltage. Their device is different, and the method of checking one may be absolutely useless when diagnosing another. Moreover, sometimes it can cause a breakdown of the short circuit. Therefore, before checking the ignition coil, you need to make sure that this diagnostic method is applicable to it.

Character failures
The coil is a fairly reliable element, it rarely fails. On the same Togliatti classics, short circuits often "survived" the engine itself. Temhowever, for various reasons, the coil sometimes breaks. You can recognize this by the following symptoms:
- engine troit, i.e. there are misfires in the cylinders, and they periodically do not work;
- check engine lights up on injection car;
- lack of engine power;
- engine will not start, this symptom is typical only for carbureted cars;
- engine becomes "gluttonous", average fuel consumption may increase by more than 10%;
- difficult to start the engine in severe frosts;
- on vehicles with an ignition module, failure of two cylinders at once.
With a high degree of probability, it is possible to assume a coil malfunction only in the latter case. All other symptoms are characteristic of many other nodes. Therefore, when they occur, you need to check both the ignition coil and other elements of the system.

Causes of failure
Failure to follow the rules of operation is the main reason for buying a new reel. This happens in the following cases:
- Using poor quality or non-specified spark plugs.
- An unprofessional engine wash can cause the secondary winding to short circuit on its case.
- Overheating. The potential laid down by the designers allows the coils to work at high temperatures. However, cases of short circuit damage due to overheating are not uncommon.
The last point requires a short explanation. Overheatcoils can occur not only due to the high temperature in the engine compartment. Sometimes it is caused by oil leakage and a short circuit in the secondary winding. Therefore, if you suspect overheating, you need to check the ignition coil for both tightness and the absence of conductivity between the turns.
A few words about the multimeter
This device must be purchased or borrowed from someone. Despite the fact that it is possible to check the ignition coil with both a multimeter and a conventional tester, it is undesirable to use the latter. Its accuracy is insufficient, and more skills will be required. An ordinary Chinese multimeter is more suitable for testing a coil.
Of the many modes of the device, only one will be used - resistance measurement. The multimeter has several ranges for this. When testing a coil, only three are needed: 200 Ohm and 20 kOhm, and 2000 kOhm. This is enough to get accurate measurements. Now you can go directly to the process of checking each of the three types of coils.

Diagnosis of "classic" short circuit
This does not mean that we will talk about how to check the ignition coil VAZ 2101-2107. "Classic", in the sense of having the most common design, in other words, the one that was installed on carburetor engines. The check is made for the absence of an open in the primary and secondary windings and a short to the ground.
The coil has three leads. Two of them are marked with "+" and "-" signs, the third is central, inthe main high-voltage wire is inserted into it. Checking the coil is done in the following order:
- Set the multimeter switch to 200 Ohm. The indicator should show the number 1.
- Connect the probes of the device to each other. On the screen - the error of the multimeter, it is important to take it into account when measuring small resistances.
- Disconnect wires from terminals and center contact.
- Install the probes on the "+" and "-" terminals, polarity does not matter.
- The readings of the device, taking into account the error, should be within 0.5-2 Ohm.
- Now you need to measure the secondary winding.
- The device is placed in the position of 20 kOhm.
- Set the multimeter probes to the "-" terminal and the central contact.
- The normal value is 6-8 kOhm. Sometimes it can reach 12 kOhm. In any case, there should not be a break.
- Set switch to 2000 kOhm.
- Put the probes on the "mass" of the car and the central contact.
- The device should show 1. This means that there is no leakage.

Checking the ignition module
This device is installed on cars with an injection engine, mainly on the domestic VAZ. Its peculiarity lies in the simultaneous supply of a spark: immediately to two cylinders 1 and 4, 2 and 3. Troubleshooting in this case is greatly simplified. If the corresponding pair of cylinders does not work, a module malfunction is diagnosed. In the vast majority of cases, this is truebut sometimes, however, extremely rarely, the entire module fails. In this case, you will have to check the ignition coil of the VAZ injector with a multimeter. For this you need:
- Disconnect the connector from the module and pull out the high voltage wires.
- Set switch to 200 Ohm.
- Alternately measure the resistance between the middle and outer contacts of the connector.
- The reading must be within 0.5 ohms. In this case, its error must be taken into account.
- Now you need to measure the resistance of the secondary windings. It is necessary to install the probes in series between the high-voltage terminals of the first and fourth, and then 2 and 3 cylinders.
- Set the mode switch to 20 kOhm.
- The device should show a resistance of about 5.4 kOhm.

Check individual short circuit
Coils of this type are installed on each candle, hence the name. Thus, not only was it possible to get rid of unreliable high-voltage wires, but most importantly, to significantly increase the efficiency of each of them. Therefore, most often they are installed on 16-valve engines. A distinctive feature of individual coils is the high resistance of the secondary winding. This must be taken into account before checking the ignition coil of a 16-valve engine with a multimeter. You may need to use a larger measurement limit. The verification sequence is as follows:
- Remove the contact block from the coil.
- Set the device switch to 200 Ohm.
- Measure the resistance between the extreme contacts of the coil, it should be within 1 Ohm.
- Now you need to transfer the device to the range of 2000 kOhm and install the probes on the middle contact of the terminal and the contact inside the rubber cap.
- Resistance should be 300-400 kOhm.
- This way you need to check each coil. There should be no significant differences in the readings of the device.

Features of measurements
The measurements of the primary and secondary coils given here are rather arbitrary. Firstly, a household multimeter is clearly not enough to measure a value of the order of 1 Ohm. This does not mean that it cannot be used. The presence of an interturn circuit in the primary winding can only be detected with sophisticated laboratory instruments. At the same time, it will be possible to establish its integrity with a multimeter, and this is quite enough for diagnostics.
Secondly, the resistance of the secondary winding may vary depending on the type of coil and brand of car. Therefore, before checking the ignition coil on the Prior, Grant, and other domestic and foreign cars, you must refer to the manual to clarify the relevant data.
Recommended:
Ignition module as an element of the ignition system

The ignition system is a set of elements that, during synchronous operation, provide ignition of the air-fuel mixture. One of the very important elements of the ignition system is the ignition module
How to check the Niva-Chevrolet ignition module

The ignition module (MZ) of a Niva-Chevrolet car is highly reliable and, most often, provides sparking over many tens of thousands of kilometers. However, if it fails, it is difficult to diagnose due to the lack of obvious signs. The decent cost of the module does not always allow it to be replaced with a new one, which is called "blindly". First you need to reliably verify the malfunction of the old one. How to check the Niva-Chevrolet ignition module, read the article
"Lada-Kalina": ignition switch. Device, principle of operation, installation rules, ignition system, advantages, disadvantages and features of operation

Detailed story about the ignition switch Lada Kalina. General information and some technical characteristics are given. The device of the lock and the most frequent malfunctions are considered. The procedure for replacing with your own hands is described
How to ring the ignition coil with a multimeter? Basic ways

The schematic of the part is very simple, but it is absolutely impossible to start the engine without it. Its functional purpose is to convert the voltage of the on-board circuit into high-voltage pulses sufficient to form a spark. The cause of the problem may be a factory defect or a general malfunction of the vehicle. Therefore, every driver should know how to ring the ignition coil on their own with the help of available tools, which will quickly restore the equipment to working capacity
Troit the Priora engine (16 valves): causes and troubleshooting. How to check the spark plugs and ignition coil "Lada Priora"

Despite the huge amount of criticism against the Lada Priora, this is one of the most popular cars that have come off the AvtoVAZ assembly line in recent years. "Priora" is equipped with a fairly successful engine with good dynamics, the interior turned out to be very comfortable. And in the maximum trim levels useful options are offered. But at the same time, from time to time, the car brings minor problems to the owners. One of the most popular malfunctions is the Priora engine troit (16 valves)

