2026 Author: Erin Ralphs | ralphs@carsalmanac.com. Last modified: 2025-01-22 21:14:12
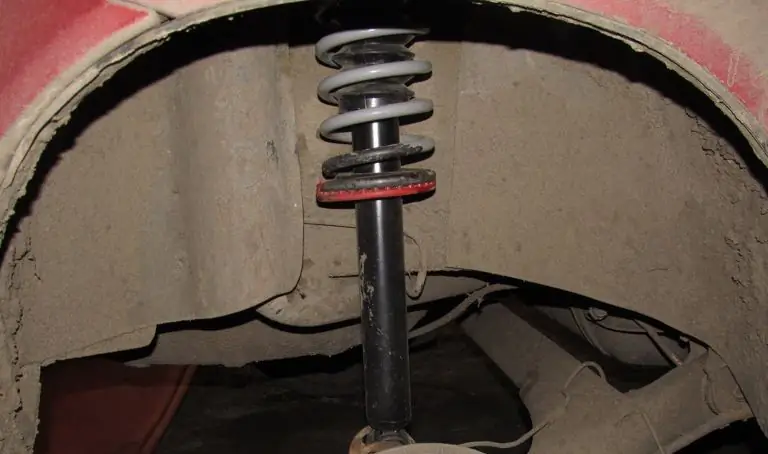
Shock absorber struts are designed to smooth out vibrations caused by various bumps when the car is moving. Unfortunately, despite the constant road construction, they have to work quite intensively. As a result - early failure and the need for replacement. To do this, it is not necessary to contact the service and spend additional funds. Rear struts "Kalina" can be replaced by yourself, sometimes even without removing the wheels.
When is it necessary to replace the rear struts?
For shock absorbers, there is no replacement period and overhaul period. The condition of the rear pillars of the "Kalina" is largely determined by the conditions and intensity of operation. In the vast majority of cases, they fail after 30-50 thousand kilometers. Sometimes it happens much earlier, and in some cases the machine maywalk 70,000 kilometers. Therefore, the racks must be periodically checked. Sometimes their malfunction can be determined visually.

Signs of malfunction
Damage shock absorbers, unlike many other parts of the car, are relatively easy to identify. You should think about a malfunction of the Kalina rear struts in the following cases:
- oil smudges on the shock housing;
- rocking the car when overcoming bumps;
- knock in the rear suspension;
- heavy lean when cornering.
In any case, when there are doubts about the maneuverability of the car, its handling, or any discomfort is felt while driving, you should first of all pay attention to the rear pillars of the Kalina.

How to make sure the rack is working?
Sometimes it is impossible to visually establish the cause of extraneous noise when the car is moving. For example, the rear racks of the Lada Kalina are clean, without oil drips. Rocking also does not allow you to unambiguously diagnose a malfunction. However, the rattle in the rear suspension area does not go away.
In this case, you will have to drive the car onto the shaker. It simulates road bumps, and special sensors monitor how various suspension elements work out. The data is transmitted to a computer, which draws conclusions about the he alth of the racks. This pleasure, of course, is not free, but it will not hit the wallet very hard either. The cost of a computerdiagnostics depends on the region and is within a couple of thousand rubles. But for this money, the owner will receive data not only on the condition of the shock absorbers, but also on all the front and rear suspension units, which is especially important if a long trip is ahead.

Which stands to put?
This moment needs to be decided in advance. It should be said right away that the rear pillars of the Kalina in a hatchback, sedan or station wagon are absolutely identical. Therefore, the choice is limited only by the manufacturer and the stiffness of the springs. As for the manufacturer, experts do not recommend installing native racks due to their short lifespan. Most of the positive reviews and recommendations come from SS-20 brand products.
As for the stiffness of the springs, much depends on the driving style of the owner. Softer ones are suitable for leisurely drivers who prefer comfort to speed. If the car owner prefers an aggressive driving style, and the main operation of the vehicle falls on roads with good coverage, then you should choose hard springs. This will improve the handling of the car, however, at the expense of comfort.
Very often, owners increase the suspension in the hope of giving the car some imaginary advantages. For example, they put more rigid rear racks on Kalina. The wagon-body in this case, according to the repairmen, is able to withstand the increased load capacity. Manufacturers are wary of such experiments. Increasing the stiffness of the springs creates additionalload on the car body. This is especially unacceptable for machines that have been in operation for a long time.

Replacement order
First of all, you need to prepare the necessary tools. To carry out the work you will need:
- two ring spanners for 19;
- open-end wrench for 6;
- hammer;
- curve key for 17;
- mount;
- WD-40 or other penetrant;
- spring ties;
- flathead screwdriver;
- jack.
Replacing the rear struts "Kalina" can be done with the removal of the wheels or without dismantling. The second method is somewhat simpler and much safer, but only possible if there is a viewing hole or overpass. Therefore, it is recommended to take care of this in advance.
Replacement is made in the following sequence:
- Drive the car into the inspection hole and apply the parking brake.
- Remove the rear seat together with the backrest.
- Use a screwdriver to remove the decorative caps from the upper mount of the racks.
- Holding the shock absorber rod with a wrench (No. 6), unscrew the nut that fixes the rack with a spanner wrench (No. 17). Sometimes this is not easy to do, especially if the replacement is being made for the first time. You will have to take care of finding a special device. If the nut is loosened, the work in the cabin is finished.
- With the help of a jack, the rear wheel is hung out from the side of the rack to be dismantled. Now you need to go down into the viewing hole.
- From the bottom of the rack is attached to the bracketlong bolt and nut to be treated with WD-40.
- With a cap (No. 19), unscrew the nut, holding the bolt itself with another wrench. Sometimes such manipulations do not help, you have to use a special tool to remove the rack.
- We pull it out of the bracket. From above it is pressed by a spring, so care must be taken.
- We inspect all rubber parts. If possible, it is better to change them for new ones. Assembly is done in reverse order.
- When installing the rubber buffer on the upper part of the spring, it is necessary that the last coil rests against a special ledge. Now you need to fix it with electrical tape or nylon ties.
- The lower coil of the spring should rest against the protrusion on the cup.
- Set the rack in place, fix it with the lower mount.
- Now you need to compress the spring, gradually lowering the jack. The complexity of this operation is that at the same time the shock absorber rod must be directed into the hole of the upper mount. It is better to use the help of a friend.
- As soon as the stem gets into the hole, it is necessary to put a nut on it. This will help to pull it out to its maximum length, after which it can be unscrewed.
- Put the support washer and rubber cushion on the stem. Now you can tighten the nut.
The second rack is replaced in the same way.

Conclusion
Sometimes, after removing the rack, it turns out that its spring has some kind of defect. Replacing one of them is highly undesirable, you need to do this in pairs. New springs must have the same stiffness.
Recommended:
Checking the diode bridge with a multimeter without removing the generator

Only a few drivers know how to test a diode bridge with a multimeter, and this knowledge can be very useful. This element plays an important role in the operation of the generator, and because of it, the battery is charged correctly. Often, if there is any breakdown, drivers immediately take their car to the service station. But often it is enough just to check the diode bridge with a multimeter, after which it will be possible to solve the problem yourself
Steering rack "Renault Megan-2": features, device. Replacing the steering rack "Renault Megan-2"

Steering is a mechanism by which the car moves in the direction set by the driver. According to the owners of Renault Megan-2, repairing the steering rack is a rather time-consuming process: removal alone can take an hour. And the most problematic part, the sleeve, often breaks during dismantling and creates problems with its removal
How to store tires without rims in winter or summer? Proper storage of car tires without rims

Twice a year, cars are "changed shoes", and their owners are faced with the question: "How to store rubber?" This will be discussed in the article
Replacing the steering rack. Steering rack repair

Often on various forums dedicated to auto topics, you can find complaints from car owners about knocking in the steering wheel. In this case, most often the best way out is to replace the steering rack. Let's look at how this part is arranged, typical malfunctions, and discuss repair options
Steering rack knocks: causes and their elimination. Steering rack repair

The article talks about the reasons why the steering rack knocks when turning the steering wheel. The main malfunctions are listed, methods for their elimination are given

