2026 Author: Erin Ralphs | ralphs@carsalmanac.com. Last modified: 2025-01-22 21:14:12
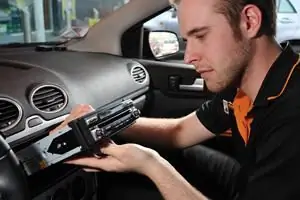
The car's audio system cannot work without a central control, the so-called head unit. Installing car radios is usually not a very difficult task, and therefore almost any vehicle owner can do it himself, especially if he had previous experience with any electronics.

Almost all modern car radios are equipped with a standardized ISO type connector. And thus, there are three installation options, depending on which connector is present in the car. The car may already have an ISO plug, there may be a connector of a different standard, and finally, the car may not have any plug at all.
The first option is the easiest, when the manufacturer has already provided for the presence of an ISO connector in the vehicle, as a rule, these are new cars. In this case, the installation of the car radio comes down to inserting the existing plug into the socket of the head unit, checking its operation and installing the radio into the seat through a special adapter frame, which usually comes with the deviceor directly, then fixing the receiver with bolts or in another way provided.
Second option: installing a car radio in a car that has a non-standardized connector, usually foreign cars manufactured from 1990 to 2004, almost every company developed its own type of connector, which was equipped with cars produced under this brand. In this case, there will be no problems either, for example, many electrical stores sell Toyota-ISO or BMW-ISO adapters, in which case you just buy an adapter for your brand of car, connect one end to the factory connector, the other to the car radio, check the operation and fix the device in the seat. This completes the installation of the car radio.

The third option, when there is no wiring, is used cars, most often domestic production, on which the car radio is installed for the first time. You will have to purchase an ISO connector and wire it yourself according to the pinout of the receiver you bought and the color code of the wires. "+12V" yellow, goes to the positive terminal of the battery through a 10-amp fuse. "ACC" red, plus from the ignition switch. "ANT" white, antenna control, it is also connected to it. "GLD" black, minus, connects to the car body. The rest of the wires go to the acoustics, the first letter: F - front, R - back, the second letter: L-left, R-right. Each speaker has two wires plus and minus. Having connected all the cables to the ISO chip,follow the instructions for the first option.

Before starting all work, do not forget to remove the terminal from the positive terminal of the battery, in case of a short circuit, this will prevent damage to the car radio. Do-it-yourself installation allows you to save money, but in case of equipment damage due to improper installation, no one will pay you for repairs. And while installing a car radio is usually easy, if you're having trouble, take it to a specialized audio installation center.
Recommended:
Installation and connection of the car radio with your own hands

The process of installing a car radio in a car is a job that can be done by hand. At the same time, the installation operation itself is not particularly difficult. An ordinary car owner, at least a little familiar with the basics of electrical engineering, will connect the car radio without any problems. How to correctly connect the radio in the car and what should be the sequence of actions, we will consider further
What do they wash the car with? Instructions and rules for the use of detergents and cleaners when washing a car

Before, cars were washed in yards and garages with rags from a bucket. Now times have changed. Almost no one does it manually anymore, and if they do, it is with the help of pressure washers. In most cities, a variety of car washes provide services. How do they wash cars in most cities?
Repair and restoration of the car body: step by step instructions and device

Even if you get into a small accident, the price of restoration work can be quite high. It seems that the complexity of the work is small and there is nothing complicated in their implementation. If there is a great desire, a little time, the necessary resources and tools, then restoring the body on your own is a completely feasible process. Let's look at the recovery technologies in stages
How to fix a license plate on a car in a frame: installation instructions, photo

Fixing a car number is a procedure that car owners consider not a very simple task. It is only required if you purchase a new machine. Therefore, many are not interested in knowing the technical features of the process, which is subsequently fraught with problems with the traffic police. Violation of the rules may result in disciplinary action. The article contains information on how to fix the number on the car
Car radio: key features. How to choose a good car radio?

Mobile phones are so firmly established in the daily life of each of us that we can no longer imagine our existence without mobile communications. But, unfortunately, there are situations when it is impossible to use modern communications. This is where authorization comes in

